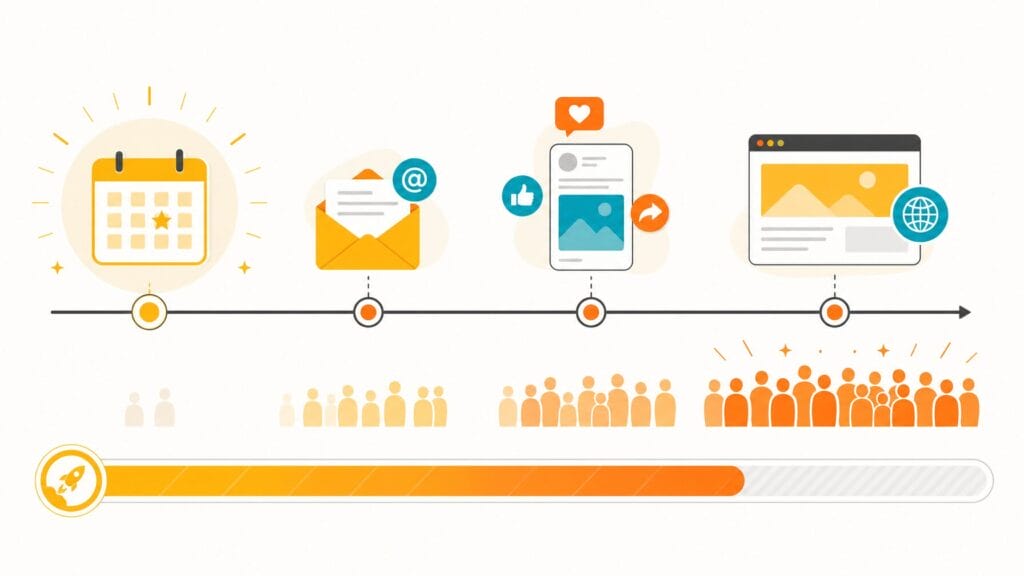
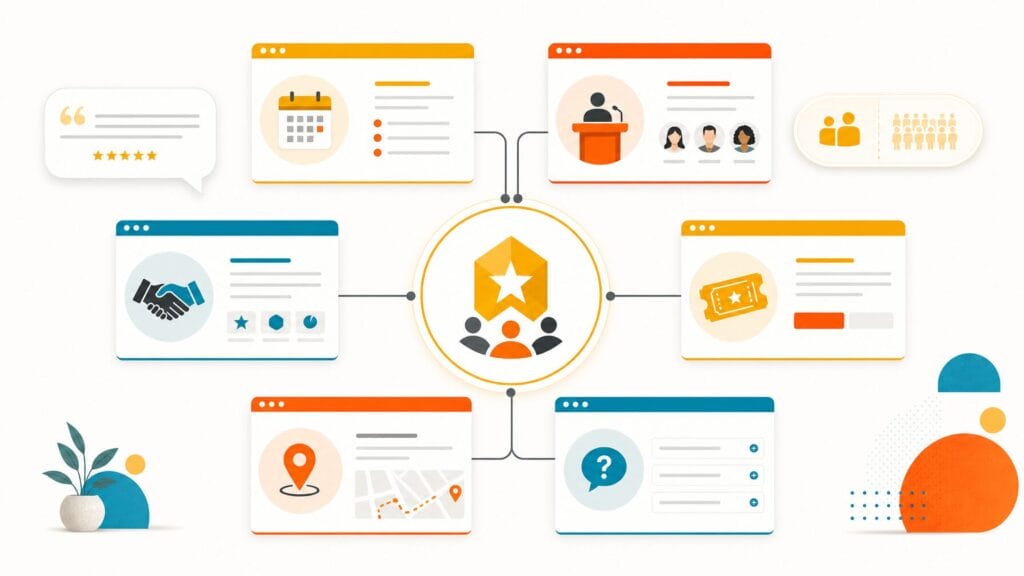
How to Increase Event Registration: 10 Proven Strategies
Getting people to your event starts well before the doors open. It begins the moment someone lands on your registration website and decides whether to complete the form.
Too many event teams treat registration as administration instead of a conversion funnel. You run event marketing, drive traffic, and hope visitors register. But what happens between a visit and a completed registration often goes unanalyzed: why visitors abandon, what brings them back, and what finally convinces them to commit.
The good news: many elements that affect registration conversion are within your control. This guide shows ten practical strategies you can apply across your registration process, website content, email marketing, and on-site experience to increase registrations and improve event attendance.
Quick preview: simplify your registration form (strategy 3), embed registration where your audience already is (strategy 4), and use segmented email flows to re-engage abandoners (strategy 6). Use these quick wins first, then layer the other tactics to build momentum.
1. Open Registration Early and Promote It Immediately
Opening registration early is one of the most effective ways to increase event sign-ups. The longer your registration window, the more opportunities you have to convert interested visitors into confirmed attendees, especially when you pair the launch with immediate, targeted promotion.
Many teams open registration and then save their biggest marketing push for later. In practice, early registrants are often the most engaged people in your audience: loyal followers, members, or repeat attendees who plan ahead. Capturing them early builds momentum, supplies social proof for later campaigns, and front-loads registrations at a time when internal stakeholders care about progress.
Open registration as soon as core event details are locked: date, location, and a preliminary agenda, even if you don’t yet have a finalized speaker list. Quick checklist before launch: confirm date and venue, set ticket types and prices, create a basic landing page, and prepare your initial email and social media posts to promote registration immediately.
Promotion channels to use right away: email to your subscriber list, targeted social media posts, featured placement on your website, and partner outreach. A simple benchmark to aim for: try to secure at least 10 to 20 percent of your expected registrations in the first month to validate interest and create early momentum.
Frequently asked: How far in advance should I open event registration?
Open registration as soon as you have the date, venue, and a basic agenda confirmed. For large conferences, that often means three to six months in advance; for smaller events, four to eight weeks is typical.
2. Use Early Bird Pricing to Create Urgency
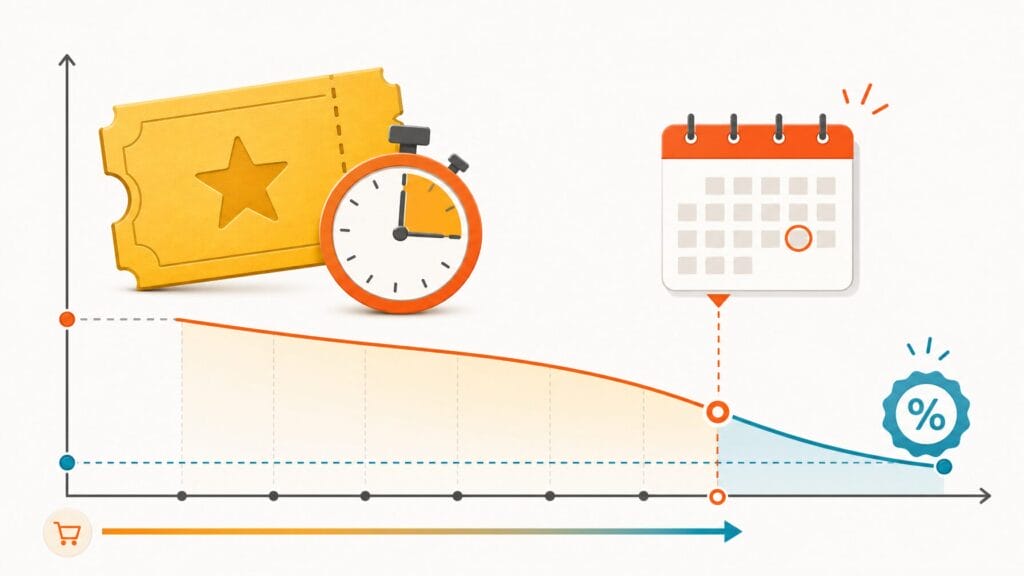
Early bird pricing is one of the most reliable ways to drive early event registration. It works by giving potential attendees a specific, time-limited reason to register now rather than later, which reduces procrastination and increases your confirmed headcount weeks before the event.
Make the mechanics explicit: use a specific calendar date for the cutoff (not vague language like “limited time only”), display the deadline everywhere, on the registration page, emails, and social media, and visibly retire the early-bird tier when it ends so late registrants see what they missed.
Suggested discount approaches: 10 to 25 percent off standard pricing, a fixed-dollar early-bird reduction, or value-adds like a free workshop or VIP networking access for early registrants. Choose a range that protects your margins while providing a meaningful incentive to people who are on the fence.
Use the early-bird window to create a three-touch cadence: announce the early-bird launch, send a reminder one week before the deadline, and a final-hours alert on the last day. Example subject lines: “Early bird tickets now open, save 20%,” “One week left for early bird pricing,” and “Final hours: early bird ends tonight.” These timely messages help increase registrations and build event momentum.
Frequently asked: What is a good early bird discount for events?
A discount of 10 to 25 percent off the standard ticket price is typical. The right amount depends on your ticket price, audience sensitivity to cost, and how far in advance you open registration. The key is making the savings clear and the deadline firm.
3. Simplify Your Registration Form
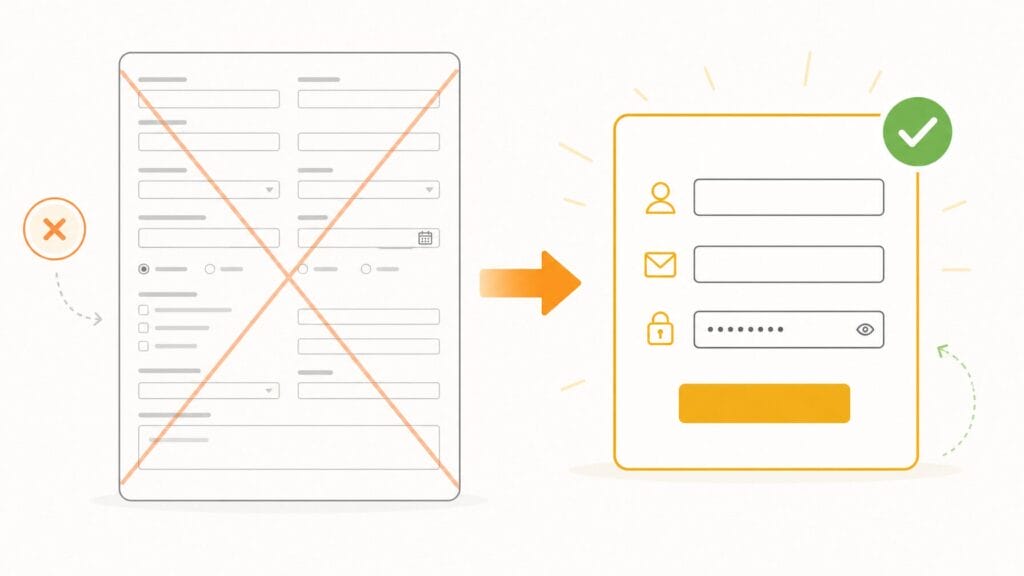
A shorter, simpler registration form directly increases your completion rate. Every additional field adds friction, and when you multiply that by ten or fifteen fields, the cumulative effect on form abandonment can be significant. The fix is straightforward: only ask for information you truly need at sign-up and collect everything else later.
Do this: audit your registration form field-by-field and ask, “Will we actually use this data before the event?” If not, move it to a post-registration survey or collect it at check-in. Keep the initial form focused on essentials to reduce abandonment and speed the registration process.
Prioritized field list (example):
- Must-have: full name, email, ticket type
- Nice-to-have: company, job title
- Post-registration: dietary restrictions, session preferences, bios
This approach preserves necessary registration data while minimizing upfront friction for most people.
Use conditional logic so each audience sees only relevant fields. Example rules: if ticket type = “speaker,” then show “bio” and “presentation title”; if ticket type = “sponsor,” then show “company logo upload”; otherwise hide those fields. That way, one form serves multiple attendee types without exposing unnecessary fields to general attendees.
Microcopy matters: add brief explanations for sensitive or optional fields (e.g., “Company: helps with networking; optional”). Test small changes with A/B experiments: try a short vs. long form, measure drop-off per field, and track time-to-complete. Key metrics to monitor: form abandonment rate, completion time, and registrations per traffic source.
Frequently asked: How many fields should an event registration form have?
Aim for three to five essential fields at sign-up (name, email, ticket type, and perhaps company). Forms with fewer than five fields consistently show higher completion rates. Move everything else to a post-registration survey or collect it at check-in.
4. Make Registration Accessible From Your Highest-Traffic Pages
Placing registration where your audience already browses is one of the fastest ways to increase event sign-ups. When visitors can register directly from high-traffic pages, such as your homepage, speaker pages, or blog, they are more likely to convert because you remove the extra step of navigating to a separate registration URL.
Embed a registration widget or place clear CTAs (calls to action) on high-traffic pages: your organization’s homepage, speaker pages, blog posts, and partner pages, to reduce friction. Rather than forcing visitors to click through to a separate URL, bring registration to where your audience already consumes content.
Quick how-to checklist
- Use analytics to identify the top pages that drive your target audience.
- Decide whether to embed the form, use a modal/slide-in, or place a prominent button.
- Implement and test on desktop and mobile.
- Track clicks, click-to-complete rate, and registrations per page to measure impact.
Suggested placements and CTA text: header CTA (“Register Now”), speaker pages (“Claim Your Seat”), blog sidebars (“Attend, Register Today”), and event landing pages (“Save Your Spot”). Promote registration links across social media channels and in partner newsletters to drive traffic back to those high-converting pages.
Implementation notes: confirm widget compatibility with your website CMS and test load times and accessibility. If embedding third-party forms, ensure security and privacy compliance (General Data Protection Regulation [GDPR]/California Consumer Privacy Act [CCPA]) and add tracking (UTMs, pixels) so you can attribute registrations to the correct page or promote channel.
Frequently asked: Where should I place the event registration button on my website?
Place a visible “Register Now” button in the site header, on speaker and agenda pages, and in blog sidebars. Pages that already attract your target audience will convert at higher rates than a standalone registration page visitors must find on their own.
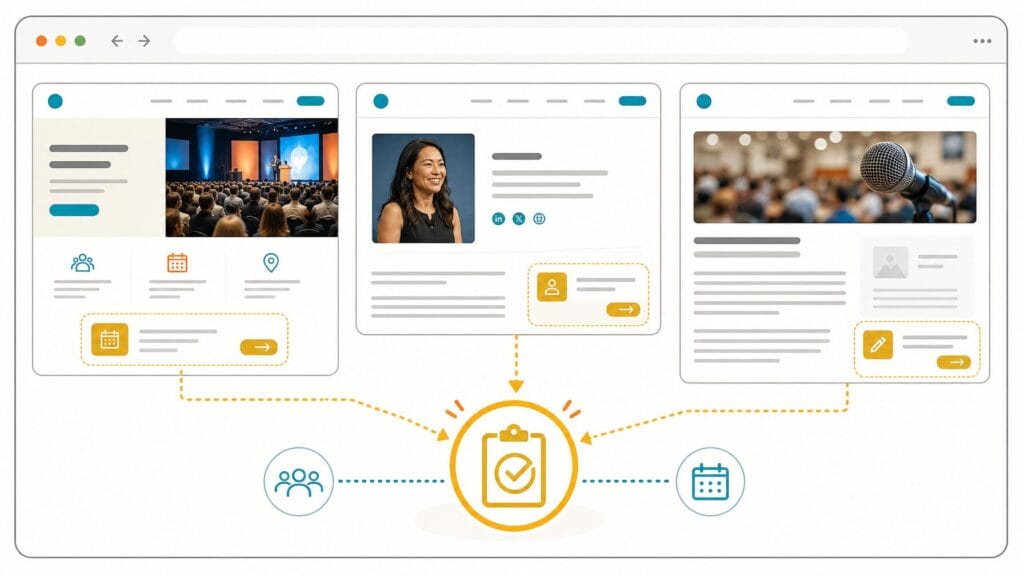
5. Build a Dedicated, Content-Rich Event Website
A dedicated event website answers the questions that come before “How do I sign up?” It gives undecided visitors the information they need, such as who is speaking, what they will learn, what the experience looks like, and why it is worth their time, so they feel confident completing registration.
Visitors who are undecided need more than a form. Include speaker bios and videos, agenda highlights, venue and travel logistics, testimonials from past attendees, sponsor recognition, and a clear FAQ. A multi-page event site with dedicated pages for agenda, speakers, sponsors, tickets, and logistics gives potential attendees the content they need to decide and helps your event registration convert at higher rates.
Think of the event website as a marketing asset: polished content improves credibility, makes the event more shareable on social media and other media channels, and supports your brand and event marketing efforts. Integrate the registration form prominently, add social proof (logos, quotes, attendee numbers), and include clear CTAs on every key page to drive registrations.
SEO and content brief
Use a descriptive page title with the event name + location/date, an H1 that includes the event name and primary benefit, and H2s for agenda, speakers, and logistics. Produce shareable assets: speaker clips, quote cards, and sponsor badges, to amplify reach. Add tracking pixels and UTM links to measure which content and channels drive the most registrations and to support retargeting.
Measure site effectiveness with conversion rate, bounce rate, and registrations by referral source. Tie these metrics back to your event planning and management goals: better content should increase qualified registrations, improve attendee experience expectations, and ultimately help you plan logistics with more confidence.
Frequently asked: What pages should an event website include?
At a minimum, include pages for the agenda, speakers, venue and travel, tickets/registration, sponsors, and an FAQ. Each page should have a visible registration CTA so visitors can sign up the moment they decide to attend.
6. Segment Your Email Campaigns by Registration Status
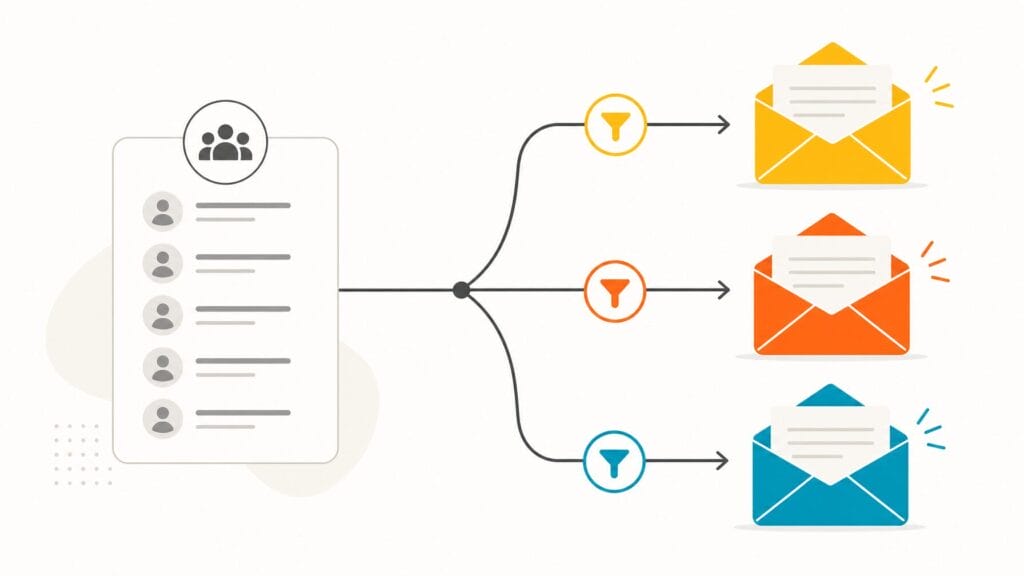
Sending the same email to everyone on your list, registrants and non-registrants alike, is one of the most common and avoidable mistakes in event marketing. Segmenting your email campaigns by registration status means each recipient gets a message relevant to where they are in the decision process, which increases open rates, click-through rates, and completed registrations.
Segment by registration status to tailor messages to three high-impact groups:
People who have not started registration: your primary conversion target. Send value-focused emails that answer “What’s in it for me?” and include a clear CTA to the registration page.
People who started but did not complete registration: a high-intent audience. Send a reminder with a direct deep link back to their incomplete form (if your platform supports it), offer a small incentive or a reminder about limited capacity, and make the path to complete as short as possible.
People who have already registered: confirmed attendees. Use these emails for logistics, agenda highlights, and community building; don’t recycle “register now” messaging for this group.
Example email sequence and subject lines
For non-starters: announce (Subject: “Join us, early access registration open”), reminder at two weeks (Subject: “Why attend [Event Name]?”), and a final push before early-bird ends (Subject: “Last chance to save”).
For abandoners: immediate reminder with saved-form link (Subject: “Complete your registration, you’re almost there”), follow-up with urgency or promo (Subject: “Seats filling fast, save your spot”).
Personalization tokens to include: first name, referenced ticket type, and a relevant speaker or session highlight. A/B test subject lines and CTAs to improve open and click-through rates.
Track these metrics to validate impact: open rate, click-through rate, and conversion to registration. Also monitor registrations attributed to each email (use UTM parameters). Most modern event registration platforms support segmentation by registration status; if yours does not, export and manage segments in your email platform or consider a platform upgrade to streamline the process.
Frequently asked: How do I re-engage people who abandoned the event registration form?
Send a reminder email within 24 hours with a direct link back to their incomplete form. Include a short summary of what they will get by attending and, if possible, a small incentive such as a promo code or waived processing fee.
7. Use RSVP Flows for Invite-Only and High-Value Events

An RSVP flow is a private, invitation-based registration process designed for curated audiences such as executive forums, member-only gatherings, or VIP experiences. Unlike a public registration form, an RSVP flow lets you control exactly who receives an invitation, track acceptances and declines individually, and follow up with high-value prospects before opening general registration.
RSVP flows deliver several practical advantages: they create a sense of exclusivity that increases perceived value; they produce an earlier, more reliable headcount for planning venue, catering, and staffing; and they give you a natural reason to follow up personally with high-value prospects who haven’t responded.
RSVP setup checklist
Compile your invite list with consent, draft a short personalized invite (include RSVP deadline and benefits of attendance), create the RSVP landing page or form, set up automated reminders (one week and 48 hours before RSVP close), and map responses into your event management system. Example invite subject: “Invitation: Join us at [Event Name], RSVP by [Date]”.
Privacy and data handling: keep invite lists secure, store consent records, and process declines appropriately (respect opt-outs). This is especially important when managing sensitive lists or cross-border attendee data under GDPR/CCPA rules.
ROI note: for high-value events, the earlier headcount and ability to personalize follow-up often reduce wasted spend on catering and increase conversion of invitees to confirmed attendees, improving both planning accuracy and the overall attendee mix.
Frequently asked: When should I use an RSVP flow instead of open registration?
Use an RSVP flow when you are targeting a specific, curated list of invitees, such as executives, members, or VIPs, and you want to track individual responses. Open registration works better when you want to reach the widest possible audience.
8. Add an AI Concierge to Answer Visitor Questions Instantly
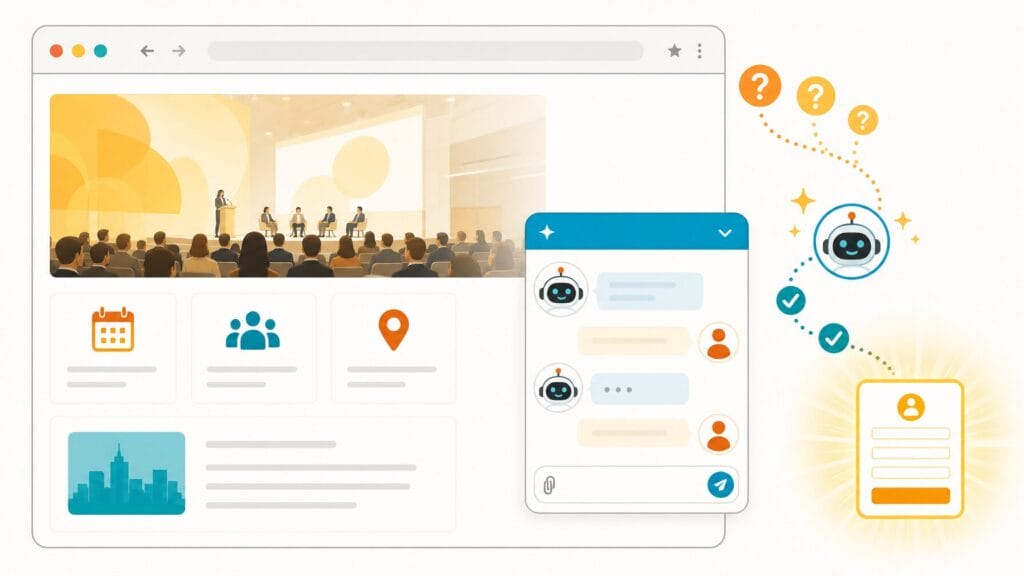
Unanswered questions are a major cause of registration abandonment. An AI concierge embedded on your event website answers visitor questions in real time, in natural language, and around the clock, which removes a common barrier between interest and completed registration.
Many people visit a registration website multiple times before committing; every visit where they can’t find an answer, whether it’s about relevance to their role, the cancellation policy, or whether accommodations are included, increases the chance they leave and don’t return.
A static FAQ helps only those who actively look for it and can’t adapt to follow-ups. An AI registration concierge engages visitors while they browse ticket options and is available 24/7, which is particularly valuable for international audiences across multiple time zones.
Common questions to train the concierge on: “Is this event right for my role?”, “What’s included with my ticket?”, “What is your refund policy?”, and “Are group discounts available?” Example response template for the AI: “Yes, this track is designed for [role]. If you’d like, I can show sessions and speakers relevant to you, or link you to the short registration form now.”
Configuration tips
Connect the concierge to your FAQ and agenda content so answers stay accurate; set escalation to a human agent for complex queries; and configure the bot to inject urgency or promotional messages when appropriate (e.g., “Only 12 early-bird tickets left, register now”). Always include a clear action CTA in responses (link to the registration form, apply promo code, or book a demo).
Measure impact with KPIs such as number of bot interactions, response-to-conversion rate (how many visitors convert after a bot session), average time-to-answer, and reduction in form abandonment. Promote the AI concierge in your social media and other content channels as a fast way to get answers and complete registration outside business hours.
Frequently asked: What questions should an event registration chatbot answer?
Focus on the questions that cause the most hesitation: ticket inclusions, refund/cancellation policies, agenda relevance by role, group discount availability, and venue logistics. These are the queries most likely to stall a registration if left unanswered.
9. Use Promo Codes to Drive Registration From Specific Groups
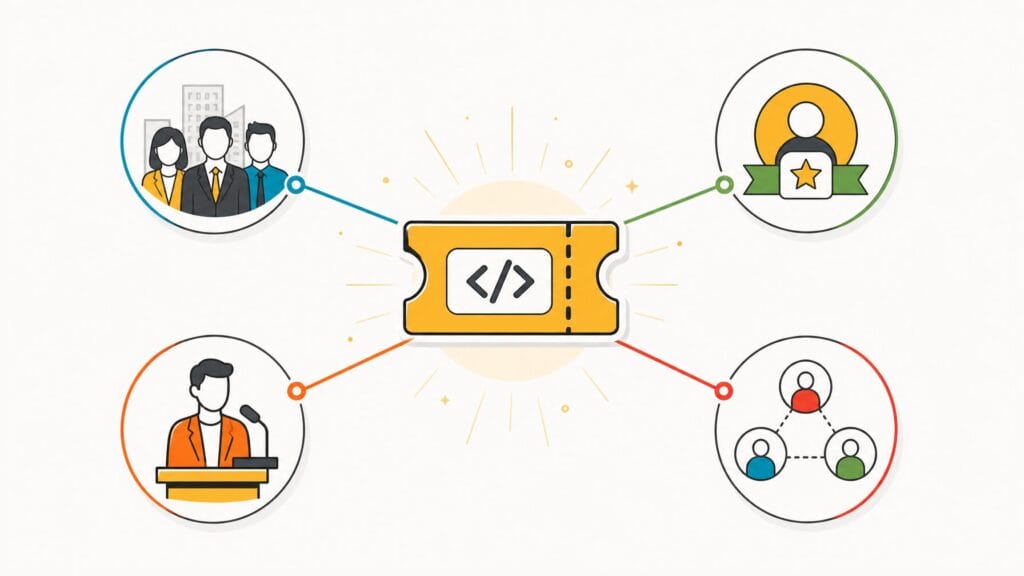
Promo codes let you offer targeted pricing to specific audiences without changing your public ticket structure. They are a flexible tool for driving registrations from groups like organizational chapters, members, speakers, sponsors, and referral partners, each with their own code and terms.
Common use cases include:
Group pricing: share a code with organizational chapters or corporate teams to reveal discounted or bundled tickets for people registering together.
Member pricing: give subscribers or members a private code that reveals a member rate not visible to the general public.
Speaker and sponsor passes: distribute complimentary passes via private codes so these ticket types remain off the public form while being easy to manage.
Referral campaigns: issue unique promo codes to existing registrants to track referrals and reward the people who bring new attendees.
Best practices and examples: choose readable code formats (e.g., ORG2026, MEMBER20, SPEAKER-INVITE), set clear usage limits and expiration dates, and share codes via personalized emails, partner pages, or private social media posts. For referrals, tie rewards to measurable outcomes (discounts, swag, or credit toward future events) and make tracking simple for registrants.
Measure impact by tracking registrations generated per promo code and incremental registrations vs. baseline. Use UTM parameters and your registration platform’s reporting to attribute event registrations to specific codes, partners, or social media posts. Ensure compliance with sponsor agreements when offering complimentary or discounted passes.
Frequently asked: How do I track which promo codes are driving the most event registrations?
Use your registration platform’s built-in reporting to see registrations per code. Combine that with UTM parameters on the links you share alongside each code so you can also see which channel (email, social, partner page) delivered the most conversions.
10. Follow Up With Non-Registrants Before the Deadline
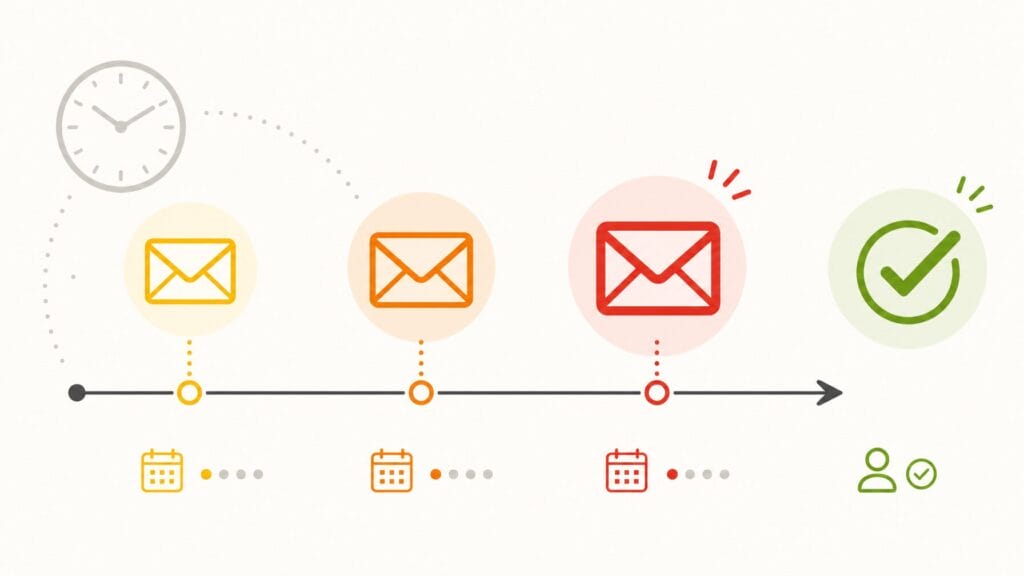
A well-timed follow-up sequence targeting non-registrants and form abandoners is one of the highest-return tactics in event marketing. In many registration cycles, a significant share of registrations arrive in the final two weeks, often within the last 48 to 72 hours, which means a deliberate final push can meaningfully increase your confirmed headcount.
Design a targeted cadence for different segments (non-starters vs. people who abandoned the form) and use clear, helpful messaging rather than pressure. Typical sequence and suggested subject lines:
Two weeks out: a reminder to non-registrants highlighting value and logistics. Subject: “Don’t miss [Event Name], here’s why you should attend.”
One week out: a targeted reminder to people who started but did not complete registration, with a direct deep link back to their incomplete form if your platform supports it. Subject: “You’re almost registered, complete your form for [Event Name].”
Final 48 hours: a deadline reminder to all non-registrants with a clear closing time and simple CTA. Subject: “Final hours to register for [Event Name], registration closes [Date].”
Personalization and tone: use the recipient’s name, reference a relevant session or speaker when possible, and frame deadlines as helpful logistics (fixed capacity or catering cutoffs) rather than high-pressure sales messages. For abandoners, consider a small incentive (e.g., waived processing fee or a promo code) if it fits your budget and brand.
Metrics and tracking: measure open rate, click-through rate, and conversion-to-registration for each email. Track registration numbers by email source using UTM parameters so you can quantify uplift from the sequence. Also monitor how many potential attendees convert after clicking a saved-form deep link versus a standard registration link.
Frequently asked: When is the best time to send a final registration reminder?
Send your last reminder 24 to 48 hours before the registration deadline. Include the exact closing date and time, a one-click registration link, and a brief reminder of the top reasons to attend. Keep the message short and action-focused.
Putting It Together
No single tactic will magically solve registration shortfalls. The most successful event teams treat the registration experience as a conversion funnel: map each stage from first visit to completed registration, use data to identify where people drop off, and iterate to improve the registration process and registration numbers over time.
Start by diagnosing your biggest gap, then apply the strategies above in priority order. Quick decision guide: if form completion is low, simplify the registration form and add conditional logic; if traffic is high but conversions are low, improve your event website content and add on-site support like an AI concierge; if email opens are strong but click-throughs lag, segment by registration status and refine your messaging.
Priority next steps (quick wins)
- Remove two non-essential fields from your form today.
- Add a “Register Now” CTA to your top three website pages.
- Send a segmented email to abandoners with a one-click resume link or clear next action.
Measurement plan (key KPIs)
Conversion rate (visitors to registrations), form abandonment rate, registrations by channel (website, email, social media), email CTR-to-registration, and registration numbers over time. Use UTM parameters and your registration platform reporting to attribute registrations to specific content and media channels so you can improve spend and effort.
Remember: registration is the first real interaction your potential attendees have with your event. Treat it as part of the attendee experience and a core element of event planning and management, and you’ll improve conversion, fill more seats, and deliver a more successful event.
Book your EventMobi demo to see how you can effortlessly create the right registration experience for every attendee type.
